
Theme Requirements
Make sure you have the latest version of WordPress, or at the very least version 4 on your self-hosted WordPress site.
Theme Installation
- After logging into your WP Admin, navigate to Apperance > Themes
- Click the Add New button at the top
- Click on “Upload Theme”
- Click the “Choose File” option
- Locate and the cortex.zip on your machine after downloading it from ThemeForest, and click the “Install Now” button.
- After installation is complete, click the “Activate” link, now Cortex should be activated and ready for the next step
- (Optional) Upload the cortex-child.zip file, and then click the “Activate” link if you plan on doing CSS and template customizations so when we release new features (and we plan to) you don’t wipe out any of the core theme files.

Plugins Installation
After you activate the Cortex WordPress Theme, you’ll want to activate a few plugins. Three of them are required to run the theme that were all custom made by us. There are also some that are optional, but we recommend at least using the Slider Revolution plugin, which helps with the pretty slideshows on the demo sites. (or ugly slideshows if you don’t like them)
- Click the Begin Installing Plugins link
- The next page will allow you to install and activate the plugins you’d like.
- The following is a list of required and optional plugins
Required Plugins
Cortex Post Types
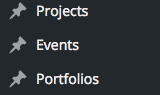 This plugin creates the custom post types for projects, portfolios, and events. These three post types are required for several of the page builder components for displaying projects, photo galleries, and events that are automatically archived after the date has passed.

Cortex Short Codes
This generates a third row of buttons for TinyMCE that should look like the image above. This makes it easier to include short codes in the WordPress TinyMCE editor for things like columns, type accents, collapses, and tabs. You’ll have to click on the ![]() icon to make sure the second and third row of buttons are displaying.
icon to make sure the second and third row of buttons are displaying.
Cortex Widgets
 This generates all of the custom widgets we use in the theme demos. This includes an Instagram widget for displaying your photos in two sizes, a twitter widget, latest posts widget that shows featured images and can be limited by category, as well as a handful of others that we detail on the widgets page of the docs.
Recommended Plugins
SLIDER REVOLUTION(Or, the Revolution Slider depending on which part of the site you’re on. Those guys really need to get their acts together.) Slider Revolution is used throughout most of the demos for animated slideshows. The theme also has several other built in sliders that don’t use this plugin, but we recommend using it if you plan on importing demo content or else the demo won’t look right.
CONTACT FORM 7This gives you the ability to add forms to pages and widgets through out the site. We used them for contact forms and request a proposal forms on the theme demos
REGENERATE THUMBNAILSIf you are changing to Cortex from a different theme, this plugin is for you. The regenerate thumbnails plugin will go through your featured images and regenerate the image sizes required by the Cortex theme. For instance, if your old theme used square thumbnails, our theme uses horizontally-oriented thumbnails, so they would appear skewed and out of proportion. This theme will go back through all of your theme featured images and re-crop them to fit in proportion with the sizes required by the theme.
WP RETINA 2XFor helping with display of 2x images on higher resolution displays. Depending on what type of device you’re accessing the site on, this plugin gives you the ability to serve up higher resolution images that can also be generated by the theme. You could also just upload 2 versions of every image and add @2x to the filename. For instance, if your image name was hashtags-are-for-stupids.jpg and it’s a standard 72dpi JPG image, you would also upload an image called hashtags-are-for-stupids@2x.jpg that is saved at 144dpi, or is twice as large as the original. (a 720×480 image would then be uploaded as 1440×840 image)
WordPress does support native responsive images now so this plugin isn’t necessarily required, but it’s very helpful for creating double resolution imagery from the WordPress Admin.
WOO COMMERCECortex fully supports Woo Commerce both with default layouts, as well as throughout the Page Builder, where you can add custom layouts of Woo Commerce products.
SIDEBARSBy default, the Cortex WordPress Theme gives you seven sidebars (listed below), and we realize that there are times when you may want to create more sidebars that can take the place of the seven default ones. That’s where Woo Sidebars comes in. This gives you the ability to create new sidebars that overwrite the default sidebars, or you can create them with no parameters at all and select them from within page builder, and custom page layouts from the Cortex templates.
- Default Sidebar – Used as the default for posts and pages
- Category Sidebar – Used on Category page layouts
- Events Sidebar – Used on single event pages
- Woo Commerce Sidebar – Used on Woo Commerce page templates
- Short Sidebar – Can be used on many page builder layouts and with post sliders since that section usually isn’t as tall as blog posts
- Footer Top – Top full width footer for Cortex Twitter, Instagram, Email, or Subscribe Widgets
- Footer A-D – Bottom Footer widget areas in a few layouts
Demo Content Importoptional
If you’re starting fresh, or would like to use our demos as a baseline for getting your site content loaded in, (which we highly recommend) then you’re going to want to import the XML Demo Content, as well as any necessary Slider Revolution Templates, depending on the demo you chose. First, decide which demo you’d like to install, and then do the following:
- Login to the WP admin if you haven’t already, and navigate to Tools > Import.
- Click on “WordPress” (if the importer plugin is not installed, install it now)
- Select the corresponding .xml file located in the folder of the demo you have downloaded from ThemeForest.
- Click “Upload file and import” button.
- After that file has uploaded, a prompt will come up asking you if you want to import attachments. Make sure you check off to download & import file attachments if you want to have placeholding images loaded in, otherwise you will have to input them yourself. The majority of the photos are from our own archives, or were from royalty free photography websites, do with them what you would like!
- That’s it! Your site should now be populated with demo content.